This casserole captures so many of my favorite fall flavors: sweet butternut squash and savory sage with nutty Parmesan cheese and toasty pecans. Also, there's bacon. Need I say more?
I've adapted this recipe from a cookbooks I use often when entertaining: Not Your Mother's Casseroles, by Faith Durand. I love casseroles when I'm entertaining, and this collection of casseroles is elegant and modern. I try to get them in the oven just before my guests arrive, and then I don't get stuck in the kitchen alone! What are your tricks for entertaining?
Too much cooking. Too many dishes. Way too many cookbooks.
Showing posts with label make ahead. Show all posts
Wednesday, October 19, 2011
Saturday, October 1, 2011
Sweet and Sour Cucumber Salad
This is a very simple dish, and a little bit retro. It's the kind of thing I've only every seen in Jewish style delis or in diner salad bars, sitting next to the carrot raisin salad. Really, this dish is closer to a quick refrigerator pickle. My husband, who hates cucumbers, admitting to kind of liking this. It's quick and easy -- just be sure to make it ahead so that the cucumbers and onions absorb the maximum amount of flavor.
Labels:
cheap,
Emily's Table,
low-fat,
make ahead,
salad,
side dish
Sunday, September 25, 2011
Apple Muffins
These are simple, wholesome muffins, packed with chunks of fresh apples. I am a huge fan of muffins, but usually I end up eating them alone. My husband liked these so much though that I actually had to share the leftovers! They are good and filling to eat for breakfast with a piece of fruit. My usual complaint about muffins is that after I eat one, I'm hungry an hour later. So I consider these quite a success!
Labels:
breakfast,
cheap,
eating well,
low-fat,
make ahead,
The Simple Art of Eating Well,
whole grain
Monday, September 12, 2011
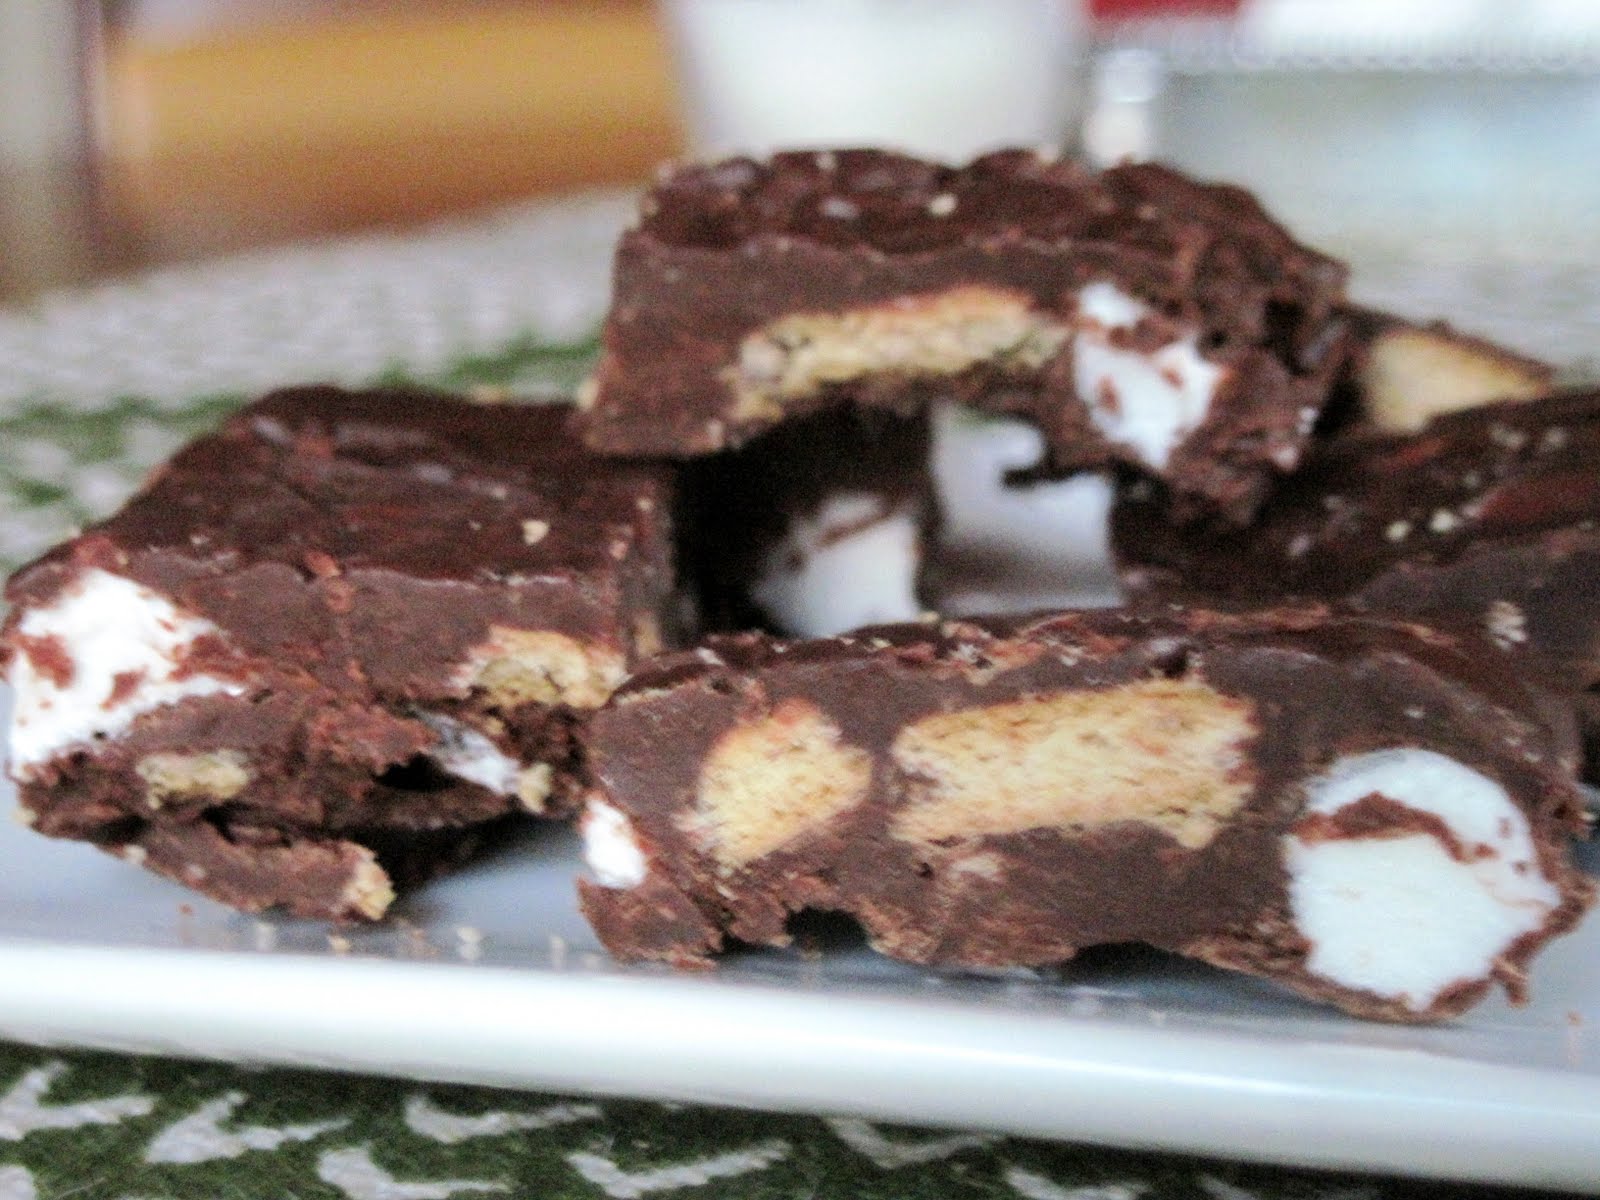
"S'mores" Fudge
Here's a fun way to take a favorite summer flavor with you into fall. What's more -- this is so quick to make! The generous addition of marshmallows and graham cracker really lightens things up a bit, and keeps this fudge from being as cloying as some of the others out there. This is great to share! I brought some in to school today for the teachers for the first day of school, and brought home an extra container.
Wednesday, August 31, 2011
Pasta Fagioli Casserole
Hello, September! Hello Pasta Fagioli Casserole! I have to confess, this year, I have no nostalgia for summer. I am so ready for the fall, and this a perfect dish to warm your belly on a chilly night. Though, to tell you the truth, my chilly nights still come from the air conditioner. Don't judge me people. I like fall.
My mom made a great, quick pasta fagioli when I was growing up, and we had it sometimes before dinner and often as a meal. It was a frequent request among my sister and me. I've shared my love for that dish with my husband, and so we were both excited to try this warm, baked pasta fagioli. It's closer to a baked pasta dish than a soup...the broth turns into a thin, but flavor-packed sauce. The flavor of the red wine, celery, carrots, and rosemary are an incredible complement to the Parmesan cheese.
This can be made ahead and either refrigerated or frozen, which makes it a great dish for entertaining...or for a late work-night. We made ours vegetarian (or almost vegetarian...I still used chicken broth). But you could also add some Italian sausage or chicken or turkey sausage, sauteed before the aromatics are added to the Dutch oven. I am really curious about trying it with a little turkey bacon...I'd cook it before sauteing the vegetables, remove it from the pan, crumble it, and sprinkle it on top with the Parmesan cheese before baking.
Do check out the cookbook this recipe comes from ...You've Got It Made, by Diane Phillips. It's a great collection of elegant make-ahead appetizers, main-dishes, braises, casseroles, and desserts. Make-ahead dishes are often my preference for entertaining, so that I can spend time with my guests. I really love that this cookbook offers dishes that are worthy as guests!
Pasta Fagioli Casserole
serves 6-8
adapted very slightly from You've Got It Made, by Diane Phillips
Ingredients:
2 Tbsp olive oil
1 cup chopped onion
1 clove garlic
4 rips celery, chopped
2 cups chopped carrots
1 Tbsp chopped fresh rosemary
1/4 cup red wine
1 tsp salt
1 tsp freshly ground black pepper
1 14.5 oz can diced tomatoes in their liquid
1 14.5 oz can vegetable or chicken broth
1 small square Parmesan or Pecorino rind, cut into small pieces
3 14.5oz cans of beans (I used two can of chickpeas and one can of small white beans), drained and rinsed
1/2 lb elbow macaroni
1/2 cup grated Parmesan cheese
Directions:
1. Chop the vegetables and set aside. Heat the oil in a large Dutch oven over medium heat. Add the onion, garlic, celery, carrots, and rosemary. Saute for 5 minutes, until the vegetables begin to soften.
2. Add the wine, salt, and pepper, and boil until the wine is reduced by half. This will happen quickly, in about 2-3 minutes. Add the tomatoes, and return the mixture to a boil.
3. Add in the broth, cheese rind, and beans. Simmer the mixture, uncovered, for 25 minutes. Add the pasta, and cook for an addition 8 - 10 minutes, until the liquid has thickened and the noodles are al dente.
4. At this point, you may let the dish cool, and then cover and put in the fridge for up to 2 days, or the freezer for up to 2 months.
5. If baking ahead, defrost the casserole in the refrigerator overnight before baking. Preheat the oven to 350 Fahrenheit, and allow the casserole to come to room temperature (around 40 minutes) before baking.
6. Cover the top of the casserole with the 1/2 cup grated Parmesan.
7. Bake for 25 minutes, until the sauce is bubbling and the cheese is beginning to brown.
My mom made a great, quick pasta fagioli when I was growing up, and we had it sometimes before dinner and often as a meal. It was a frequent request among my sister and me. I've shared my love for that dish with my husband, and so we were both excited to try this warm, baked pasta fagioli. It's closer to a baked pasta dish than a soup...the broth turns into a thin, but flavor-packed sauce. The flavor of the red wine, celery, carrots, and rosemary are an incredible complement to the Parmesan cheese.
This can be made ahead and either refrigerated or frozen, which makes it a great dish for entertaining...or for a late work-night. We made ours vegetarian (or almost vegetarian...I still used chicken broth). But you could also add some Italian sausage or chicken or turkey sausage, sauteed before the aromatics are added to the Dutch oven. I am really curious about trying it with a little turkey bacon...I'd cook it before sauteing the vegetables, remove it from the pan, crumble it, and sprinkle it on top with the Parmesan cheese before baking.
Do check out the cookbook this recipe comes from ...You've Got It Made, by Diane Phillips. It's a great collection of elegant make-ahead appetizers, main-dishes, braises, casseroles, and desserts. Make-ahead dishes are often my preference for entertaining, so that I can spend time with my guests. I really love that this cookbook offers dishes that are worthy as guests!
Pasta Fagioli Casserole
serves 6-8
adapted very slightly from You've Got It Made, by Diane Phillips
Ingredients:
2 Tbsp olive oil
1 cup chopped onion
1 clove garlic
4 rips celery, chopped
2 cups chopped carrots
1 Tbsp chopped fresh rosemary
1/4 cup red wine
1 tsp salt
1 tsp freshly ground black pepper
1 14.5 oz can diced tomatoes in their liquid
1 14.5 oz can vegetable or chicken broth
1 small square Parmesan or Pecorino rind, cut into small pieces
3 14.5oz cans of beans (I used two can of chickpeas and one can of small white beans), drained and rinsed
1/2 lb elbow macaroni
1/2 cup grated Parmesan cheese
Directions:
1. Chop the vegetables and set aside. Heat the oil in a large Dutch oven over medium heat. Add the onion, garlic, celery, carrots, and rosemary. Saute for 5 minutes, until the vegetables begin to soften.
2. Add the wine, salt, and pepper, and boil until the wine is reduced by half. This will happen quickly, in about 2-3 minutes. Add the tomatoes, and return the mixture to a boil.
3. Add in the broth, cheese rind, and beans. Simmer the mixture, uncovered, for 25 minutes. Add the pasta, and cook for an addition 8 - 10 minutes, until the liquid has thickened and the noodles are al dente.
4. At this point, you may let the dish cool, and then cover and put in the fridge for up to 2 days, or the freezer for up to 2 months.
5. If baking ahead, defrost the casserole in the refrigerator overnight before baking. Preheat the oven to 350 Fahrenheit, and allow the casserole to come to room temperature (around 40 minutes) before baking.
6. Cover the top of the casserole with the 1/2 cup grated Parmesan.
7. Bake for 25 minutes, until the sauce is bubbling and the cheese is beginning to brown.
Labels:
cheap,
low-fat,
make ahead,
vegetarian main-dish,
You've Got It Made
Wednesday, August 24, 2011
Cinnamon Toast French Toast Bake
I have become obsessed with make-ahead breakfasts, and french toast casseroles are among my favorites. They are great for having family or friends for brunch, but I think it's decadent and cozy to make one for just the two of us. It is a great way to ensure that a weekend morning starts off slowly: one of us gets out of bed to put the casserole in the oven, and then we laze about and have coffee while the french toast bakes. There are many, many wonderful ways to spend a weekend morning that do not involve standing over a pan frying up some french toast!
This baked french toast is warm and rich with the taste of cinnamon and brown sugar. It's sort of like the Pioneer Woman's cinnamon rolls hooked up with french toast. This french toast is a lot less sweet than the creme brulee challah french toast that I made a couple of weeks ago, which frees you up in terms of toppings...hello maple syrup!
Cook's notes: I adapted this recipe from The Stocked Kitchen
, by Sara Kallio and Stacey Krastins. Have you seen this book yet? If you are interested in menu planning, saving money, and organizing your meal prep, then this is a great volume! I lightened the recipe up a little. Also...I didn't have white bread sitting around, but instead some hot cross buns on the verge of becoming stale. This was a great way to use them up! I cubed my rolls, so my casserole looks a little more like a bread pudding. But you can go ahead and use sandwich bread, and put it flat into the dish, which will look more like classic french toast.
Cinnamon Toast French Toast Bake
serves 4
adapted from The Stocked Kitchen
, by Sara Kallio and Stacey Krastins
Ingredients:
2-4 Tbsp unsalted butter, melted
2 tsp cinnamon, divided
1/2 cup brown sugar
8-9 slices bread, crusts removed according to your preference,
or the equivalent cubed cinnamon bread or cinnamon rolls
3 eggs
4 Tbsp granulated sugar, divided
1 1/2 cups milk
1 tsp vanilla extract
Directions:
1. Spray an 8 inch square baking pan, or 7 x 11 baking pan, with nonstick spray.
2. Mix together the melted butter, 1 tsp of the cinnamon, and the brown sugar. Spread one third of the mixture on the bottom on the baking pan.
3. Cover the cinnamon-butter-sugar mixture with 3 slices of bread (or the equivalent cubed bread). Sprinkle another third of the cinnamon-butter-sugar spread on top. Repeat, layering bread and cinnamon mixture, until both have been used up.
4. In a mixing bowl, lightly beat the eggs. Add 2 Tbsp of the granulated sugar, the milk, and the vanilla. Pour over the bread.
5. Mix the remaining 1 tsp cinnamon with the remaining 2 Tbsp sugar. Sprinkle over the top of the casserole.
6. Cover, and refrigerate overnight, or for at least 2 hours.
7. Preheat the oven to 350 degree Fahrenheit.
8. Bake for 1 hour. Let sit for 10 minutes, and then serve with maple syrup.
This baked french toast is warm and rich with the taste of cinnamon and brown sugar. It's sort of like the Pioneer Woman's cinnamon rolls hooked up with french toast. This french toast is a lot less sweet than the creme brulee challah french toast that I made a couple of weeks ago, which frees you up in terms of toppings...hello maple syrup!
Cook's notes: I adapted this recipe from The Stocked Kitchen
Cinnamon Toast French Toast Bake
serves 4
adapted from The Stocked Kitchen
Ingredients:
2-4 Tbsp unsalted butter, melted
2 tsp cinnamon, divided
1/2 cup brown sugar
8-9 slices bread, crusts removed according to your preference,
or the equivalent cubed cinnamon bread or cinnamon rolls
3 eggs
4 Tbsp granulated sugar, divided
1 1/2 cups milk
1 tsp vanilla extract
Directions:
1. Spray an 8 inch square baking pan, or 7 x 11 baking pan, with nonstick spray.
2. Mix together the melted butter, 1 tsp of the cinnamon, and the brown sugar. Spread one third of the mixture on the bottom on the baking pan.
3. Cover the cinnamon-butter-sugar mixture with 3 slices of bread (or the equivalent cubed bread). Sprinkle another third of the cinnamon-butter-sugar spread on top. Repeat, layering bread and cinnamon mixture, until both have been used up.
4. In a mixing bowl, lightly beat the eggs. Add 2 Tbsp of the granulated sugar, the milk, and the vanilla. Pour over the bread.
5. Mix the remaining 1 tsp cinnamon with the remaining 2 Tbsp sugar. Sprinkle over the top of the casserole.
6. Cover, and refrigerate overnight, or for at least 2 hours.
7. Preheat the oven to 350 degree Fahrenheit.
8. Bake for 1 hour. Let sit for 10 minutes, and then serve with maple syrup.
Wednesday, August 17, 2011
Oatmeal Apple Fig Crisp
So I love the fall. Everyone loves fall, right? Well, me, I'm extending the love to August, which promises the anticipation of fall. No one loves August, I don't think. But I do. I love the slow quiet days, the bright colors, back-to-school shopping, and early apples.
We picked some early apples last weekend. And it was clear to me, when I noticed that my fruit basket was about to overflow, that something had to to be done.
And so, I did it. I surprised my husband with a warm, apple fig crisp for dessert following our meatloaf the other night. I felt like a very good and proper wife, serving meatloaf and apple crisp on a Sunday night.
(I watched a lot of the Donna Reed Show on Nick at Nite during my formative years. It apparently had a big impact. Really big. I wear aprons.)
And now, a few notes for the chef...this crisp recipe is adapted from You've Got It Made
, by Diane Phillips. This is a great little volume about make ahead meals, with many that can be frozen, including this one. It can be frozen, unbaked, for up to two months, before serving. I think that Donna Reed would have thought this quite clever. I didn't have quite enough apples for Phillips' recipe (um, we ate a bunch), so I added in the dried figs. They are great in a crisp! The filling here uses a combination of brown and white sugar, which creates a lovely caramel syrup among the fruit. I would recommend serving this with unsweetened whipped cream, greek yogurt, or creme fraiche.
Oatmeal Apple Fig Crisp
adapted from You've Got It Made
, by Diane Phillips
serves 6-8
Ingredients:
TOPPING:
3/4 cup old fashioned rolled oats (not instant)
2/3 cup all purpose flour
3/4 cup firmly packed light brown sugar
1/4 cup granulated sugar
1/2 tsp salt
1/2 cup (1 stick) cold sweet butter, cut into 1/2 inch cubes (or substitute 1/4 cup butter and 1/4 cup SmartBalance, as I did)
FILLING:
3 large tart apples, peeled, cored, and thinly sliced (about 4 or 5 cups)
1/2 cup quartered dried figs (about 12)
1/2 cup granulated sugar
1/2 cup firmly packed light brown sugar
2 TBSP cornstarch
1 tsp ground cinnamon
1/2 tsp ground nutmeg
2 tsp lemon juice
Directions:
1. First prepare the topping. I use my miniature food processor for this, and it fits perfectly, but go ahead and use your large one if you haven't got a small one. Combine the oats, flour, both sugars, and salt in the bowl of the food processor. Pulse on and off to blend. Add the butter (or butter and SmartBalance combination) by sprinkling the small bits on top of the combined topping. Pulse on and off about 10 times, until the mixture just comes together.
2. Now prepare the filling. I do this right in my baking pan -- it makes fewer dishes. You can use a 9 inch round pie dish or a 9 inch square pan. Combine the apples, figs, both sugars, cornstarch, cinnamon, nutmeg, and lemon juice. Stir until the apples are well coated.
3. Sprinkle and press the crumble over the fruit mixture.
4. At this point, you may cover and freeze for up to two months.
5. Or you may just bake the crumble for 45 to 55 minutes in a preheated 350 degree oven. It should be bubble and the topping should be golden brown. Allow it to rest for 10 minutes before serving.
We picked some early apples last weekend. And it was clear to me, when I noticed that my fruit basket was about to overflow, that something had to to be done.
And so, I did it. I surprised my husband with a warm, apple fig crisp for dessert following our meatloaf the other night. I felt like a very good and proper wife, serving meatloaf and apple crisp on a Sunday night.
(I watched a lot of the Donna Reed Show on Nick at Nite during my formative years. It apparently had a big impact. Really big. I wear aprons.)
And now, a few notes for the chef...this crisp recipe is adapted from You've Got It Made
Oatmeal Apple Fig Crisp
adapted from You've Got It Made
serves 6-8
Ingredients:
TOPPING:
3/4 cup old fashioned rolled oats (not instant)
2/3 cup all purpose flour
3/4 cup firmly packed light brown sugar
1/4 cup granulated sugar
1/2 tsp salt
1/2 cup (1 stick) cold sweet butter, cut into 1/2 inch cubes (or substitute 1/4 cup butter and 1/4 cup SmartBalance, as I did)
FILLING:
3 large tart apples, peeled, cored, and thinly sliced (about 4 or 5 cups)
1/2 cup quartered dried figs (about 12)
1/2 cup granulated sugar
1/2 cup firmly packed light brown sugar
2 TBSP cornstarch
1 tsp ground cinnamon
1/2 tsp ground nutmeg
2 tsp lemon juice
Directions:
1. First prepare the topping. I use my miniature food processor for this, and it fits perfectly, but go ahead and use your large one if you haven't got a small one. Combine the oats, flour, both sugars, and salt in the bowl of the food processor. Pulse on and off to blend. Add the butter (or butter and SmartBalance combination) by sprinkling the small bits on top of the combined topping. Pulse on and off about 10 times, until the mixture just comes together.
2. Now prepare the filling. I do this right in my baking pan -- it makes fewer dishes. You can use a 9 inch round pie dish or a 9 inch square pan. Combine the apples, figs, both sugars, cornstarch, cinnamon, nutmeg, and lemon juice. Stir until the apples are well coated.
3. Sprinkle and press the crumble over the fruit mixture.
4. At this point, you may cover and freeze for up to two months.
5. Or you may just bake the crumble for 45 to 55 minutes in a preheated 350 degree oven. It should be bubble and the topping should be golden brown. Allow it to rest for 10 minutes before serving.
Sunday, August 7, 2011
Red Barbecue Sauce
I'm sure you all have your own favorite recipe for barbecue sauce, but this is ours. My husband loves barbecue sauce, and this one is his favorite out of all the recipes I've tried. It it thick and full of smoky, deep flavor with some nice heat to it. It is simple and easy to make, and you probably have everything you need in your pantry right now. This recipe makes a quart. It is great with pulled chicken, pinto beans, sauteed onions and cheddar cheese in a burrito. Or over pizza crust, with pulled chicken, peppers, onions, and mozzarella.
The recipe comes from Cheap, Fast, Good,
which is part of the Desperation Dinners series. I love these cookbooks! Beverly Mills and Alicia Ross, the authors, consistently come through with their promises of recipes that are very fast, easy, and inexpensive. What's more, the recipes are also consistently delicious and never taste like a quickly cooked dinner!
Red Barbecue Sauce
yields 1 quart
from Cheap, Fast, Good
by Beverly Mills and Alicia Ross
Ingredients:
1 1/2 cups ketchup
8 oz tomato sauce
1 /2 cup lightly packed brown sugar
1/2 cup red wine vinegar or cider vinegar
1/3 cup Worcestershire sauce
2 Tbsp low sodium soy sauce
1 1/2 Tbsp lemon juice
1 tsp minced fresh ginger
1/2 tsp black pepper
1/2 tsp ground mustard
1/2 tsp garlic powder
1/2 tsp onion powder
1/2 tsp dried oregano
1/2 tsp dried basil
1/2 tsp red pepper flakes, or more, to taste
1/4 tsp allspice
Directions:
1. In a large saucepan, mix together all ingredients.
2. Heat through to boiling. Lower heat to a simmer, and cook for an additional 15 minutes, stirring occasionally.
3. Remove the sauce from the heat. Store in the refrigerator up to 1 month.
The recipe comes from Cheap, Fast, Good,
Red Barbecue Sauce
yields 1 quart
from Cheap, Fast, Good
Ingredients:
1 1/2 cups ketchup
8 oz tomato sauce
1 /2 cup lightly packed brown sugar
1/2 cup red wine vinegar or cider vinegar
1/3 cup Worcestershire sauce
2 Tbsp low sodium soy sauce
1 1/2 Tbsp lemon juice
1 tsp minced fresh ginger
1/2 tsp black pepper
1/2 tsp ground mustard
1/2 tsp garlic powder
1/2 tsp onion powder
1/2 tsp dried oregano
1/2 tsp dried basil
1/2 tsp red pepper flakes, or more, to taste
1/4 tsp allspice
Directions:
1. In a large saucepan, mix together all ingredients.
2. Heat through to boiling. Lower heat to a simmer, and cook for an additional 15 minutes, stirring occasionally.
3. Remove the sauce from the heat. Store in the refrigerator up to 1 month.
Labels:
cheap,
Cheap Fast Good,
Desperation Dinners,
make ahead,
quick
Creme Brulee Challah French Toast
You know, most of the time when you talk to women about their weddings, they groan about how they didn't get to eat a thing. Well, what can I say about myself? Even my own wedding didn't come between me and a meal!
We had a brunch wedding, which we loved and would highly recommend. I love brunch and always wanted a brunch wedding -- it was perfect for us. The Dishwasher and I both adored the french toast that they served: a creme brulee challah french toast. I promised him that I would try to recreate it for our 1st wedding aanniversary. Well...I was only a good 5-6 weeks late!
This recipe comes from the Food Network. It delivers a creamy, caramel flavored french toast. As you serve it, you discover a lovely bit of caramel syrup at the bottom of the pan, which is great for spooning over top -- just like a flan. The original recipe calls for Grand Marnier, but I substituted orange zest. The Dishwasher said he would prefer it without the orange flavor next time, but I thought it was rather lovely in cutting through the sweetness a bit. I would recommend serving this topped with a dollop of Greek yogurt.
You prepare this the night before, and then bake it in the morning. I always think that that is an ideal format for brunch recipes. I will definitely make this the next time we have company for brunch! It is incredibly decadent and delicious. I did try to lighten it up a bit, but it still came in at so many Weight Watchers Points Plus that I will keep the number to myself! We thought it tasted a lot like the dish we had at our wedding. If you want the full, very rich recipe, go ahead to the Food Network...but here is my slightly lighter version. Also, the recipe says it serves 6. I will not tell you how quickly it is disappearing from our fridge, and there are only two of us here.
Creme Brulee Challah French Toast
serves 4-6
adapted from The Food Network
Ingredients:
1/2 cup light butter (I buy a product without trans fats)
1 cup packed browns sugar
2 TBSP light corn syrup
1 medium to large loaf challah, cut into 1 inch thick slices
1 1/4 cups egg substitute
1 1/2 cups fat-free half-and-half
1 tsp vanilla
1 tsp orange zest (optional)
1/4 tsp salt
Directions:
1. Over medium heat, in a small saucepan, stir together the light butter, the brown sugar, and the corn syrup. Heat through until all of the ingredients are melted and well combined.
2. Pour into a 9x13 baking pan.
3. Place the thick slices of challah bread into the 9x13 baker. They should fit into the pan as tightly as possible.
4. In a bowl, combine the egg substitute, the half-and-half, the vanilla, the orange zest, and the salt.
5. Pour over the top of the challah bread.
6. Cover tightly and refrigerate at least 8 hours, and up to 24 hours.
7. Remove from the fridge and bring to room temperature before baking.
8. Preheat oven to 350 degrees Fahrenheit.
9. Bake for 35-40 minutes, until the casserole is golden and puffed up.
We had a brunch wedding, which we loved and would highly recommend. I love brunch and always wanted a brunch wedding -- it was perfect for us. The Dishwasher and I both adored the french toast that they served: a creme brulee challah french toast. I promised him that I would try to recreate it for our 1st wedding aanniversary. Well...I was only a good 5-6 weeks late!
This recipe comes from the Food Network. It delivers a creamy, caramel flavored french toast. As you serve it, you discover a lovely bit of caramel syrup at the bottom of the pan, which is great for spooning over top -- just like a flan. The original recipe calls for Grand Marnier, but I substituted orange zest. The Dishwasher said he would prefer it without the orange flavor next time, but I thought it was rather lovely in cutting through the sweetness a bit. I would recommend serving this topped with a dollop of Greek yogurt.
You prepare this the night before, and then bake it in the morning. I always think that that is an ideal format for brunch recipes. I will definitely make this the next time we have company for brunch! It is incredibly decadent and delicious. I did try to lighten it up a bit, but it still came in at so many Weight Watchers Points Plus that I will keep the number to myself! We thought it tasted a lot like the dish we had at our wedding. If you want the full, very rich recipe, go ahead to the Food Network...but here is my slightly lighter version. Also, the recipe says it serves 6. I will not tell you how quickly it is disappearing from our fridge, and there are only two of us here.
Creme Brulee Challah French Toast
serves 4-6
adapted from The Food Network
Ingredients:
1/2 cup light butter (I buy a product without trans fats)
1 cup packed browns sugar
2 TBSP light corn syrup
1 medium to large loaf challah, cut into 1 inch thick slices
1 1/4 cups egg substitute
1 1/2 cups fat-free half-and-half
1 tsp vanilla
1 tsp orange zest (optional)
1/4 tsp salt
Directions:
1. Over medium heat, in a small saucepan, stir together the light butter, the brown sugar, and the corn syrup. Heat through until all of the ingredients are melted and well combined.
2. Pour into a 9x13 baking pan.
3. Place the thick slices of challah bread into the 9x13 baker. They should fit into the pan as tightly as possible.
4. In a bowl, combine the egg substitute, the half-and-half, the vanilla, the orange zest, and the salt.
5. Pour over the top of the challah bread.
6. Cover tightly and refrigerate at least 8 hours, and up to 24 hours.
7. Remove from the fridge and bring to room temperature before baking.
8. Preheat oven to 350 degrees Fahrenheit.
9. Bake for 35-40 minutes, until the casserole is golden and puffed up.
Wednesday, September 29, 2010
Cinnamon Rolls
Think of this post as a public service announcement. I am going to just take a minute here to highly recommend, that, on your next rainy Sunday morning, you click on over to the Pioneer Woman's website and get to work on these cinnamon rolls. You and your family will be very, very happy. We were!
If, like me, you only have two people in your family, this recipe halves very well. This was a relief, since I think that even though it's just the two of us...we could have easily polished off the 50 of these that the entire recipe makes! I made half the recipe, which yielded just about 20 cinnamon rolls. I baked them all, but froze one tray. We had unexpected guests that afternoon, and polished off the first tray. With mulled apple cider (boozed up with some Butterscotch Schnapps, thanks mom!) and a little early Halloween candy, it was, I have to say, my best party ever. And completely unplanned. I daresay, Martha would have been proud. And maybe even the Pioneer Woman. I am lucky enough to have her cookbook, and have definitely gotten a lot of use out of it. But the rest of you can just follow this link. I will say this though -- I am pretty sure I have never used so much butter and sugar at once! Nor made such a mess of my tiny kitchen. All totally worth it. I am now considering using that much butter and sugar in everything! Turns out...fat and sugar taste very, very, very good indeed.
Labels:
breakfast,
cheap,
make ahead,
snacks,
The Pioneer Woman Cooks
Monday, September 27, 2010
Apple Cranberry Torte
As far as recipes go, Marian Burros' Plum Torte is pretty darn famous, having appeared in the New York Time something like 15 times. Growing up, however, I thought of it as my mom's famous plum torte. A big fan of Elegant But Easy
(by Marian Burros and Lois Levine), my mom made this torte often and it was requested even more often.
So imagine my surprise, as an adult, when I discovered that other people knew about my mom's plum torte! Although, if you ask me, not enough people know about Elegant But Easy! I myself cook from The New Elegant But Easy Cookbook, the second edition that came out in the `90's. As a fickle owner of many cookbooks, I am quite loyal to this one, and turn to it when I need to bring along a dish to a potluck or am entertaining. The dessert chapters, in particular, have never let me down. There is a Chocolate Angel Food Cake recipe in there that is a favorite of mine! My only complaint about this book is that the brownie recipe is all gussied up, not the simple Barbara's Brownie recipe in the original book. That was our classic family brownie recipe growing up, and my sister even made it to a state fair on that recipe! I have to confess that I am keeping an eye out for an old copy of the original book, even though it is pretty out of date.
This Apple Cranberry Torte recipe appears in the new edition of the book, alongside the original plum torte. And, for those of us who like to keep things healthy, there is even a healthier version. I've yet to try that one, but I will let you know if I do soon! I have a full basket of apple from apple picking on the kitchen table, so you never know.
This torte, like the original plum torte, is easy peasy. And moist and delicious and very impressive when you arrive to a party with it in hand. Really, can you ask for anything more?
Apple Cranberry Torte
from The New Elegant But Easy Cookbook, by Marian Burros and Lois Levine
serves at least 8
Ingredients:
1/2 cup dried cranberries
3 medium-large tart, firm apples
1/2 lemon
1 stick unsalted butter, softened
3/4 cup plus 2-3 Tbsp sugar
2 eggs
1 cup all-purpose flour
1 tsp baking powder
1-2 tsp cinnamon, or to taste
1/4 cup currant jelly or apricot jam
Directions:
1. Preheat the oven to 350 degrees. Butter a 10-inch springform pan.
2. Bring 1 and 1/2 cups water to a simmer and then remove from the heat. Add the dried cranberries and soak for about 15-20 minutes, until the berries become plump. Drain well. Meanwhile, peel and core the apples. Cut into 1/2 inch thick wedges. Squeeze the lemon juice from the 1/2 lemon over the apples so that they do not brown. Set aside.
3. Cream the butter and the sugar using an electric mixer until fluffy. Add the flour, eggs, and baking powder. Stir until well-combined. Stir in the cranberries, reserving a small handful to sprinkle on top.
4. Spread the batter evenly in the prepared pan.
5. Starting from the outside, place the apple wedges in concentric circles, pointed edges facing towards the center.
6. Combine the 2-3 Tbsp sugar with 1-2 tsp cinnamon (to taste). Sprinkle the cinnamon-sugar mixture liberally over the apple wedges. Toss the remaining cranberries over the top.
7. Place in the pre-heated oven and bake about 40-50 minutes, until the top is golden brown, the apples are tender (but not mushy), and a cake tester inserted into the center comes out dry.
8. This cake refrigerates and freezes well when carefully wrapped.
9. Before serving, melt the jelly over the stove top. Use a pasty brush to glaze the cake with the melted jelly.
Thursday, September 9, 2010
Roasted Vegetable and Bacon Muffleta
This stuffed sandwich is a great little make-ahead meal, filled to the brim with roasted peppers, onions, zucchini, bacon, goat cheese, and fresh, peppery arugula. Every now and then, the "science" and "art" of cooking (okay, or dumping and stirring, in my case), still amazes me. And so, on that note, I must confess, that this muffleta seemed like magic to me! I had never made (or tasted!) this traditional Italian stuffed sandwich. And so, when I miraculously fit all of the ingredients into the bread shell, I was pretty impressed with myself. And then, when it held together after being sliced, well, I was ready to give myself an honorary degree or at the very least a pat on the back!
Traditionally, muffletas are stuffed with much more meat than this. But, if you've noticed...we don't eat very meat-heavy. I adapted this recipe from Rachel Allen's Favorite Food at Home
The vegetables here roast up in about 30 minutes or so, and then it just takes a few minutes to assemble the sandwich. It's great if you make the night before, so that it can be pressed in the fridge over night. The key to keeping this all together when you slice it is to really stuff the sandwich, so much that you cannot possibly fit anything else in there. Again, I was so shocked by how much I could fit into that loaf of bread! It was like Mary Poppins and her purse...only in opposite! I just kept putting more and more in there!
Roasted Vegetable and Bacon Muffleta
serves 4-6
adapted from Favorite Foods at Home
, by Rachel Allen
Ingredients:
2 large red onions, peeled, and cut into 1/2 inch thick slices
2 medium zucchini, cut in half lengthwise, and then sliced vertically into 1/4 inch thick slices
2-3 red bell peppers, seeded and stemmed, cut into thirds (feel free to substitute 2-3 bottled roasted red peppers packed in water, drained and allowed to dry a little)
8 slices bacon (turkey bacon or regular)
1 round loaf of bread, about 8 inches in diameter, preferably sourdough
2 Tbsp pesto (homemade or not, I won't tell on you)
1 tsp olive oil
2 tsp water
4 ounces goat cheese (log or crumbles are fine, both will work)
a few large handfuls baby arugula leaves
salt and pepper
Directions:
1. Preheat the oven to 400 degrees Fahrenheit. Meanwhile, spread the zucchini, red onions, and peppers (if roasting fresh peppers) on foil-lined baking sheets. Spread them out so that they will roast (if you put them all on one sheet they will just steam). Spray them with cooking spray, and sprinkle them with a little salt and pepper. Toss with tongs to be sure everything is coated.
2. Roast the vegetables in the oven for about 30 minutes, until they are beginning to brown and caramelize. You can stir them once at the halfway point, but you can also just ignore them and they will be very forgiving.
3. Meanwhile, cook the bacon according to package directions.
4. Slice the very top off of the bread to create a "lid." Scoop out the inside, leaving a shell. The inside of the bread can be tossed into a food processor and then dried out in the oven to create fresh breadcrumbs, if you wish.
5. Thin the 2 Tbsp of pesto with 1 tsp olive oil and 2 tsp of water. Stir well. With a large spoon, coat the inside of the bread and the inside of the lid of the bread well with the pesto mixture.
6. Once the vegetables are out of the oven and slightly cooled, it is time to start stuffing the sandwich! (If you are using additional meats, put those in first.) Start with half of the bacon, and follow with half of the roasted peppers. Next, place in half of the goat cheese (crumbled or sliced.) The next layer is half of the roasted zucchini followed the by roasted red onions. At last, put in half of the arugula. Use your hands or a large spatula to gently push everything down, so there will be room for the next layer.
7. Repeat step 6 with the second half of the ingredients. The sandwich should be very, very full...if it is not, it will not hold together when you slice it. Once you have fit everything in, place the lid on top.
8. Cover the loaf in plastic wrap and place it on a large plate. Now you need to figure out a system to weight it! I have a panini press at home (not a machine, just a press to use on a sandwich on a skillet) that worked wonderfully. You could also place a second plate or a cutting board on top of the sandwich, and weigh it down with few cans or jars of jelly. Let it rest, pressed, in the fridge for 3 hours or up to a day before cutting into wedges and serving.
To check out more cheap, healthy eats, click on over here to Family Food Fridays!
Labels:
cheap,
cookbooks,
Favorite Food at Home,
low-fat,
main-dish,
make ahead,
Rachel Allen,
sandwiches
Subscribe to:
Posts (Atom)